By Jeff Nisley—A Big thanks to Ray Weeks and his “Notes from the Workbench”
PDF Files:
Ray Weeks ABC of LETTERING
Ray Week’s Font—Alphabet and Numbers
This Tips and Techniques article presents a way to add authentic lettering to airplane wings and other areas on your model airplane. This lettering font was popular in its day very early on because it was easy to produce on fabric wings and such because of its straight lines and 45 degree angles. Classic in nature—it has not lost its appeal, and readability.
Looking through some Flying Aces Magazines from the mid 30s to the mid 40s that are available to check out in our HAFFA Library, I came across an interesting feature segment that a very talented modeler/artist/draftsman of his day published on page 51 of the Flying Aces August 1941 issue.
Here it is. I am still amazed at the craftsmanship, drafting, and hand crafted lettering ability this piece of “artwork” possesses.
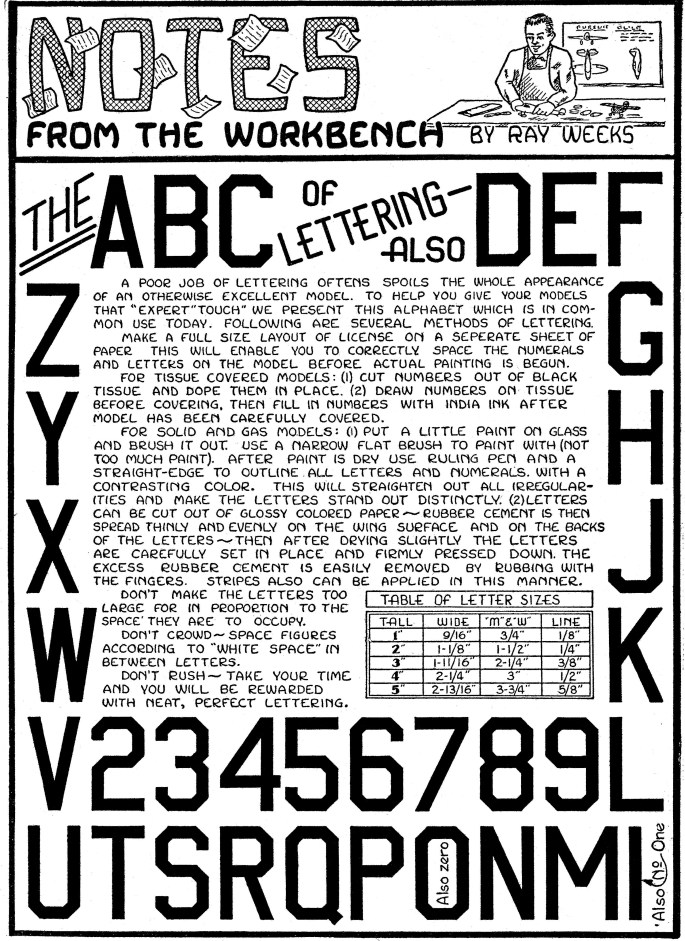
I have made Ray’s “NOTES FROM THE WORKBENCH—THE ABC OF LETTERING” available for you in PDF format so you can print a copy on your printer if you so desire here:
Ray Weeks ABC of LETTERING
 So here comes the “Authentic Lettering” part of this Tips and Techniques article—I have further gone to the trouble of making the Alphabet and Numbers in a more friendly layout. I have made available two pages of the total font characters that are about 2 1/4″ high in PDF format so you can print out Ray’s Font and use it for your own purposes (I’m sure he would approve). Ray’s directions on how to apply the lettering on the model airplane—written in 1941—amazingly still hold true today.
Download Ray’s font here: (PDF consists of 2 separate pages)
Weeks Airplane Font — Alphabet and Numbers

With today’s technology it is possible with graphic programs on computers to be able to use and edit this font in ways Ray could not have foreseen.
For starters, you can print the PDF font pages and by using a printer with the ability to scan and the ability to enlarge or reduce—you can customize the letter size you need. FedEx, Office Max/Office Depot and Staples, etc can alternatively do this for you as well.
I was able to scan Ray’s Article and paste it into a “Free and Open Source Image Editor” or graphics software program called GIMP and use the scan (with considerable clean-up and slight adjustments to individual letters) to get to the results you see here. If you have further questions about how you can use this font in your model building, you can contact me using email via the Contact Page on this website.

Numbers Placement on Model
Here are some photos of how the numbers should be placed on the aircraft. Generally speaking, the numbers appear on the right side upper wing and the lower left bottom wing as viewed from the pilots perspective.
The model airplane shown at left is the famous Hughes H-1 Racer.
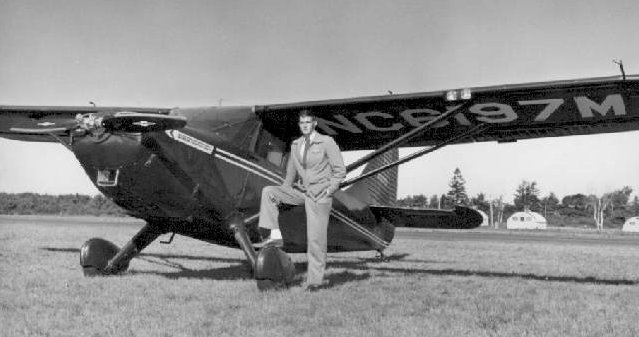
An under the wing view of typical lettering is shown at left in a photo of John Baker’s Stinson 108-3 taken 8/21/49 at Bar Harbor Airport, Trenton Maine. Pilot is is Ralph Mower
![]()
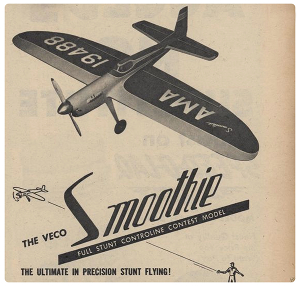
At right is an advertisement for a model showing how a model airplane kit vender placed an AMA number on the wings—which is required on all AMA model airplanes by the Academy of Model Aeronautics. There are no set rules for placement, only that is somewhere on the plane—you are the designer.
Also it goes without saying that it is a good idea to at least place your name and phone number somewhere on your model in case it catches a thermal….

Modern planes at least until the 40s still used a similar font as shown by Civil Aviation Authority specifications for a Piper Cub 1940s paint scheme shown above. Note the CAA Registration number on the tail fin.

Finally here is an alternative way to add the number to the tail.
I will end this article by again thanking Ray Weeks.
I hope this article has inspired you and has now given you the tools and know-how to add some interest and authenticity to your model by adding numbering to your models in an authentic and convincing way.
Thanks—Jeff Nisley—
