Adhesives and Finishes — by Jeff Nisley
 This page will be devoted to some of the adhesives and finishes that I have come across that I recommend when trying to figure how to best put Model Airplanes together. I don’t pretend to be an expert at any of this but I do come into the hobby in a unique position.
You see, most of my tools and materials I’ve had to research and find in the year 2016 and now 2017. I have had to ask a lot of questions concerning the hobby from members that have been doing this for years. Often I need to ask a question like: “Where did you get that pair of pliers?” or it might be about another unique item or material they have pulled out of their tool box. Their answer sometimes goes like this: “I don’t know. I picked it up years ago. The company might be out of business for all I know, you are on your own to find it.”
This was also borne out with my first visit with Hobby Haven, my local hobby shop. Nothing against them, but it seems that free flight rubber motor powered model aircraft is not as popular as it once was. Hence most of the shelf space there is taken up with radio controlled helicopters and styrofoam planes. That’s OK, It just means that much of the materials, kits and other things needed for this hobby must be found on the internet. I’m beginning now to trust buying things on the internet, and with PayPal, I currently have an order with a firm in England, something 5 years ago I thought would never happen.
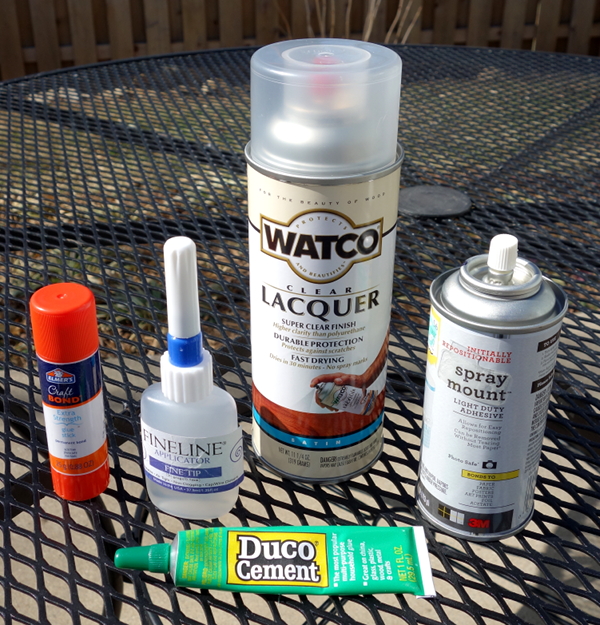
Using Duco Cement thinned down 50% with Acetone

 The great thing about gluing your project together with Duco cement is that if you need to remove the piece or adjust it, you can soften the glue by applying straight acetone and it will slowly dissolve the Duco. Make your repair, even add more, then let the Duco set up again. Ca glues don’t allow you to do this.
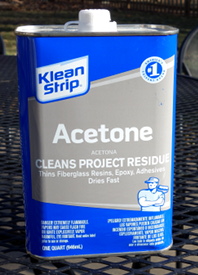
First thing I will say about Duco is that early on it was pointed out to me from the advice of long time experienced modelers, that it is best to thin it down with 50% Acetone to 50% Duco. You can buy Acetone in a quart can at Ace Hardware, Lows or Home Depot. Read the caution instructions and health warnings for this product. Be also mindful not to breathe the fumes of Acetone because it’s not that safe.
 The next thing I want to show you is a great applicator bottle for Duco that makes using the glue at this thinned down consistency controllable. The product is called Fineline Applicator 20 Guage – 20 oz (blue label and lid). My Fineline applicator bottle was purchased at Hobby Lobby but you can also purchase them online (search for Fineline applicator). It’s kind of hard to locate at Hobby Lobby—so ask an associate. The great thing is that it never clogs because the tiny tube tip has a wire in the cap that fits inside the tube when the cap is on to keep it clear. It looks a little drippy in the photo, but trust me you will learn how to control the flow and it actually wo
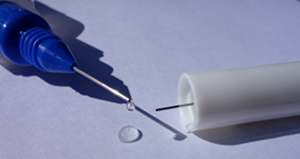 rks quite well to put the right amount of glue where you need it. With Duco you place a bit of it on the part, let it soak in, let it dry somewhat, then go back with another layer to actually glue the parts together. An additional applicator bottle can be used to contain straight acetone to dissolve the Duco as I explained above.

Elmer’s Kraft Bond Glue Stick
I use this brand of glue stick when gluing down tissue on my balsa wood model aircraft. I has the words “extra strength” on the label so I tried it. It’s also easy to get at Walmart. I use it in combination with a small pointed tip brush dipped in a mixture of 50% white Elmer’s glue and 50% water. After the tissue is lightly stretched over the balsa wood structure, I go back and brush on the 50/50 mixture of Elmer’s to secure the joint. Below is a closeup of part of the wing to my P-30. Notice the joint between the light colored tissue and the blue. I am satisfied with the strength of the Elmer’s brand to achieve this strong joint
Watco Clear Lacquer Satin Finish
 The finish for my model aircraft I am using is Lacquer and so far it has worked well for me. I use 2 light coats. I don’t know if it is the best choice, but I didn’t want to go with the traditional dope finishes. There isn’t a lot of talk on the Internet (chat rooms, etc.) about using lacquer on model aircraft (chat rooms etc.) so I’d like anyone else who has tried it to give me feedback.
  I like the Watco brand because is has satin, my choice, but they also have semi-gloss and gloss.
Printing on Tissue with an InkJet printer
There are two great articles that I have found on-line that do a good job explaining tissue printing. They are
Printing on Tissue by Paul Bradley
How to print on Tissue — Part 1 by George Bredehoft —Volare Products
George, in his article points out an important finding: “I switched from being an HP customer to an Epson customer mainly because of the ink. Epson Durabright ink is water proof – it will not run when you mist the tissue with

water to shrink it. HP in WILL RUN – so you have to be super careful while covering – even while outside (don’t get your plane wet!) Because of this, I recommend Epson printers because of the water proof ink.
George.
The graphics on the wing above were printed by my HP printer. (The “Souper – P-30” graphic) The author has found that HP will dissolve with water but not 91% isopropyl alcohol, so you can use the alcohol to mist the tissue to get it to shrink. For the graphics I used a graphics program that can be downloaded for free called Inkscape, and I used a very light mist of 3M Spray Mount (as seen in the photo at the top of the page) to attach the tissue to the paper fed into the printer. Be careful not to get 3M Spray-Ment, which is permanent adhesive. It is the Spray Mount you want. Big difference!
The tutorial will explain all you need to know to try this yourself.
Also a great example of this method of printing on tissue was performed by one of our club members, Gary Hodson, which can be viewed with this link:

Gary Hodson —Jan 2017 HAFFA Member
In addition I want to point out that there are ready-made no-cal model aircraft drawings complete with “printed tissue artwork” free to download. An example of this is this: http://www.parmodels.com/Plans/nocals.htm. Also be sure to read the comments at the beginning of this page. There are some good tips on how to print these PDF files.

If you have an idea for a Tip or Technique, let Jeff Nisley know at the monthly meeting, or email him at jeffnisley@ymail.com.
