
Photos and article by Jeff Nisley
If done the right way, applying tissue on balsa wood wing structures and other parts of model airplanes can be the most rewarding part of the build.
Although I’m not an expert on tissue covering I will try to give you 5 tips you can take away.
Hopefully you will find at least one or two worthwhile.

5 Tissue Applying Tips
Tip #1 — Watch a few of Ronny’s Videos.
Tip #2 — My Favorite Tissues, Work Surfaces, & Cutting Mats
Tip #3 — Preparing for the Tissue Shrinking Process.
Tip #4 — Advice on the actual Tissue Shrinking Process
Tip #5 — Finishing Tips


Tip #1 — Watch a Few of Ronny Grosselins’s Videos.
First and formost…
Learn to put on tissue the right way by going to and watching Ronny Gosselin’s — How To Cover a Model with Tissue Videos
— ron’s video part 1 — ron’s video part 2 — ron’s video part 3 — ron’s video part 4 — and — ron’s video part 5 —
There are 5 parts to his series. The videos are very informative. He is also extremely amusing. I really only watched Part 1 and a little of Part 2 and I was light years ahead of where my skills were before I watched them. My best quote from him comes just 33 seconds into his first video—that being “Spit is a really good squishing down agent.” — I love it.
“Spit is a really good squishing down agent.”
Ron Gosselin — December 30, 2010
I found his techniques to be right on the money. Get a bowl of popcorn and turn up the volume. He not only tells you the right way to do things, he points out the things you have to watch out for. Anyway if you want to get good at this aspect of your model building, you can’t go wrong watching his videos. Period.
Back to Tissue Applying Tips List
Tip #2 — My Favorite Tissues, Work Surfaces & Cutting Mats
My new favorite tissue is called Mt. Fuji Tissue which can be found on the Esaki page on Easy Built Models. I’ve found it to be strong, lightweight and the fibers are consistent. I find very few flaws, and it is easy to work with. It keeps its strength while damp or wet, and the line has a good palette of colors. Click on the link or the picture at left to check it out.
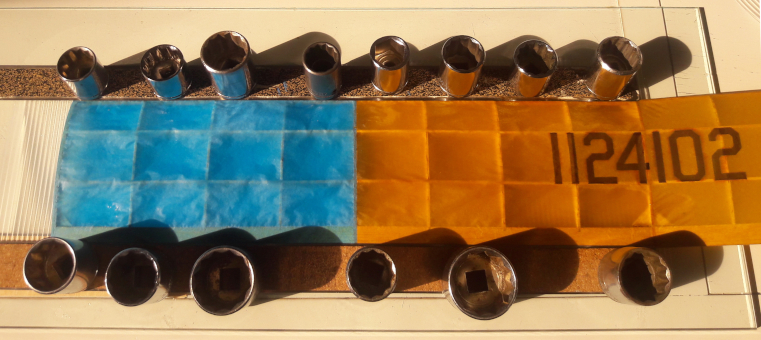
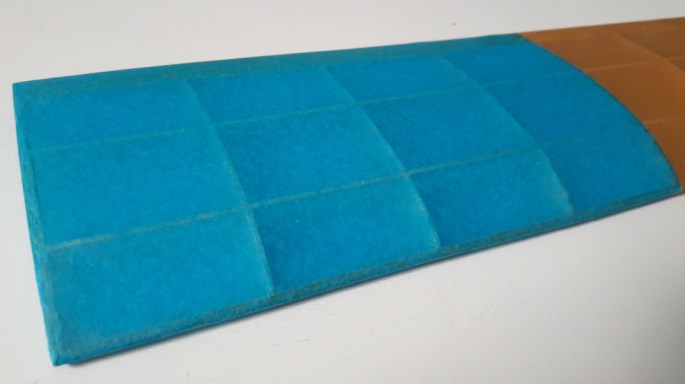
As you might know, Esaki has shut down production so Mt. Fuji is a great alternative. I also like to use the Easy Built Models Lite Tissue as well as it has a sizable list of colors, including military colors. BTW the blue tissue at the top of the page is the color EBM Deep Sky Blue in this line. The orange tissue you see is vintage tissue I happened to have in my stash.
I’d also like to point out here that it’s not a good idea to try to shrink tissue on delicate indoor models as the process of shrinkage can easily warp these structures, as some modelers unfortunately have found out about this the hard way.
There is now a new Japanese Tissue available that is really good! the name is Asuka Tissue and Peck Polymers sells it under the title Flying Bird’ Asuka tissue

There is now a new Japanese Tissue available that is really excellent! The name is Asuka Washi Tissue and Peck Polymers sells it under the title Flying Bird’ Asuka tissue . I’ve tried it and it performs very well and tends not to tear apart even when damp. Also the lineup has nice vivid colors.

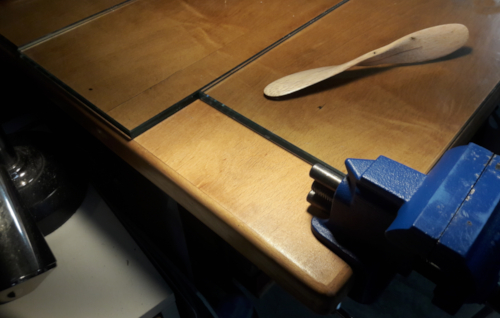
I use tempered glass shelves for my work surface.
Glass is a perfect work top surface to do modeling on as a razor blade and Windex for the most part removes any glue or spills. Even drops of CA come up relatively easy. Tempered glass shelves with smooth edges are what I use. I have three 8″ x 24″ glass shelves that I picked up at a ReStore inexpensively that I place top to bottom on my desk as shown at right. Because they are relatively small, it allows me to easily clean them individually. Also I can slide the front one over to install my portable vice and when I’m done using it I can remove it and slide the glass back. Over everything I usually place a cutting mat, however I can slide it back if i need to do my work directly on the glass. Which leads me to my next point.
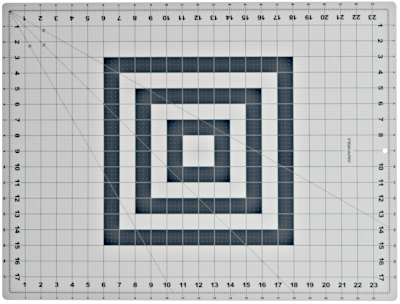
A cutting mat is a must when it comes to easily cutting tissue to size.
If you don’t already have a cutting mat, I urge you to get one. The process of cutting tissue to size works infinitely better using the inch marks and grid of the mat in concert with a straight edge and X-Acto knife. A great quality Fiskars 18 x 24″ cutting mat is under $20 at Walmart. Works great.
Back to Tissue Applying Tips List
Tip #3 — Preparing for the Tissue Shrinking Process
After you have applied the tissue to parts of your plane, the next step is to shrink the tissue to make it taught. Several things need to be in place before we start that process.
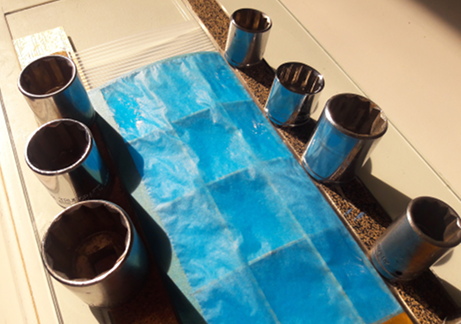
If you look closely at the photo at right, you will notice that the wing is sitting on a piece of glass and on top of what appears to be a translucent piece of plastic with ribs.
Lets talk first about the plate of glass that we have placed under the wing.
In the photo we see that wing in the has been held down flat on top of the glass by metal rulers (use stainless steel only because of rust concerns) weighted down with sockets from a socket set. Plastic rulers are also perfect as they can’t rust. They actually work better because you can see through them.
Utilize a flat sheet of glass under the part that’s drying.
A glass plate is used in this process because you know it’s waterproof and perfectly flat.
Also when you have a dihedral or multihedral wing, you only want to do one section at a time. Multihedral means there is more than one V shaped bend in the wing.
In addition to the glass sheet have a ribbed piece of shelf liner between the part that’s drying and the tissue.

Con-tact Brand Grip Premium Non Adhesive Shelf liner- Ribbed Clear (18″x 4′)
Next if you look closely under the wing there is a plastic ribbed shelf liner. This works extremely well to prevent the glued tissue from permanently sticking to anything.
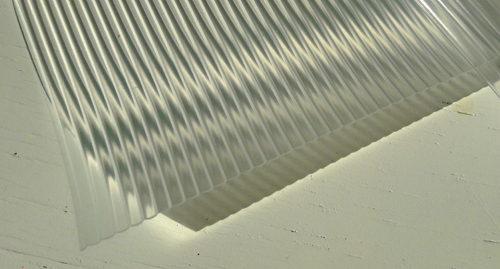
Home Depot carries this product for around $ on their Website. A little goes a long way so it is entirely possible that it could be shared with other model builder friends. Cut it in convenient strips several inches wider than the cord length of the wings or parts you pan to use it with and make sure when you use it the ribs of the liner are parallel with the ribs of your airplane wing, and that the “pointy” parts of the shelf liner are face up as shown in the photo above. This allows air to circulate under the part as it’s drying. The nice thing about using this product is that it doesn’t stick to the tissue, and together with the piece of glass underneath makes it super flat—which is exactly what you want. Because it’s held down with the rulers and weight there is no warping.
Back to Tissue Applying Tips List
Tip #4 — Advice on the actual Tissue Shrinking Process
Author’s Note: Most of the photos here are of the flying surfaces of the plane. You are going to have less of a concern of the fuselage warping during the shrinking process than say a wing, rudder or stab. Know that you will be using the same techniques, however this article specifically talks about the flying surfaces.
After you have applied the tissue and allowed it to dry thoroughly, preferably overnight, the next step is to shrink the tissue.
The idea is that when it drys naturally, the inherent qualities of the tissue will cause it to shrink, making it taught and somewhat of a more stronger surface, ready to take the final finish or coating.
As far as the medium to use to shrink the tissue, here are is some good advice from Bill Schmidt—an experienced Aeromodeler:
I never use water to shrink tissue covering as it shrinks and pulls unnecessarily tight and generally warps the structure, This is relevant to 1/16″ structures mostly and not a bigger structure. 91% alcohol does not shrink tissue as it doesn’t possess enough water content. 70% is the medium to use and seems just right. Any crowfoot wrinkles that remain after the 70% application can be fixed by licking the area gently. This system works well for me.”
Bill Schmidt — August 21, 2020
Thanks to Bill for his insight. At any rate, don’t go overboard with the misting. If you get too much mist on the tissue, which is easy to do, I have been known to take Kleenex or toilet tissue and carefully swab the excess moisture off the tissue. What you don’t want is pools of liquid on the tissue. In some cases this causes the dye in the tissue to bleed. Some tissues are better at not doing this, others are not. It’s a good idea to test this out on a scrap of tissue to get a feel for this before you start. Tissue in most cases will handle this swabbing with the Kleenex, but you need to be gentle, remembering that in this state—it’s not very strong.
Back to Tissue Applying Tips List
Tip #5 — Finishing Tips
Let the part dry thoroughly—Overnight if possible.
After misting the wing with water or Alcohol (mist both sides) allow it to dry thoroughly — preferably overnight. You want not only the tissue to dry, you want the soaked balsa wood to dry under the weight of the rulers holding it down to keep it nice and straight. If you rush this step you risk introducing warps into the wing or any other part you are working on, if the balsa is still damp. If there are 2 sides to whatever you have like a fuselage for example, mist both sides so they dry evenly together.

Final Finish Coat
For the final tissue’s coating, I like to use a product called Krylon Color Maxx Flat Finish. It also comes in a Satin finish as well. Flat is more forgiving of imperfections, but for some models I prefer the Satin. Try both to arrive at what you like. If applied properly it offers a water resistant finish and because it is a spray I would think that it is easier to apply than the traditional dope method, quicker, and a lot more consistent. Plus it is less toxic. It can be purchased at a variety of stores including Walmart and Ace Hardware. Some projects I use satin but others I prefer matte.
Apply Krylon spray paint in ideal weather conditions. We suggest applying Krylon spray paint when the temperature is between 50 and 90 degrees Fahrenheit and the relative humidity is below 85%.
Advice from the 2020 Krylon Products Group
I prefer to only put on one thin coat but sometimes it requires a second after the first coat has dried, if the overall sheen is uneven. Even with the flat sometimes a second coat improves the look. You can easily overdo the paint thickness which only adds unnecessary weight to the plane so have a light touch. If at all possible, it is advisable to pin down the part to keep it flat similar to what was shown above in the shrinking process. In some respects it’s less critical IMO because the balsa is not dampened with something that will warp it as easily. Do your test spraying on something other than your model to get a feel for the way the finish lays down and the resultant finish you are after. Also when spraying it’s best to coat both sides of flying surfaces like wings and stabs to lessen warping as it dries. One last important factor. Be sure you are spraying in ideal weather conditions. Good luck and again practice makes perfect when it comes to a successful looking finish on your models.
Back to Tissue Applying Tips List
Well —that’s about it! Hope your project(s) turns out well.
If you like this webpage or if you have a question or comment, use the LEAVE A REPLY box below. Thermals. —Jeff Nisley—
