
Article & photos by Jeff Nisley
The first half of this article addresses SMALL TISSUE TEARS while the second half deals with the LARGER ONES. This page is just one of an increasing list of Hints’n Tips.
Let’s get started.
HAFFA long time member, Mike Basta, introduced me to his method of fixing small tears in tissue back when I was new to this hobby back in 2016. The process was widely used by some aeromodelers in the past but I’m not sure it is widely known today.
Basically the technique hasn’t changed. What has changed is the use of a new type of glue used to make this technique even better. For years Mike used Duco Cement, however there is a better option.
With little fanfare a few years back, Elmer’s Products, Inc. introduced a totally clear version of their rather “milky” formula they had in production for ages—simply called Elmer’s Glue. I can remember using it in grade school back in the 50s. Yes—I’m getting up there in years. “Now—low and behold you can get what they call ‘Elmer’s Washable Color Glue’, and even a product known as ‘Elmer’s Glitter Glue, Great for Making Slime’. The kids can have fun with those whereas we will stick with the plain vanilla ‘Elmer’s Washable Clear Glue’ (no pun intended).”
“Now—low and behold you can get what they call ‘Elmer’s Washable Color Glue’, and even a product known as ‘Elmer’s Glitter Glue, Great for Making Slime’. The kids can have fun with those whereas we will stick with the plain vanilla ‘Elmer’s Washable Clear Glue’ ( no pun intended).”
This Clear glue, believe it or not—is the secret to making an almost invisible repair to tissue tears anywhere they happen on a model aircraft. Back in the old day’s you would simply make a patch to cover the rip or tear and call it “battle damage” or some referred to it as “hangar damage”.
If you follow along below in my Slide Show Tutorial and give it a try yourself, you’ll be amazed at how easy it is to make these “oops” go away, or at least not draw your attention to them.
Repairing Small Tissue Tears on a Model Aircraft
— A Step-by-Step Slide Show Tutorial —

This is the first slide in a series of 16 photos along with the instructional text associated with each. We begin this tutorial by taking a look at two small holes in the tissue of a stabilizer. Look closely and you will notice the two small holes in the tissue just below the brown stripe. In this tutorial we will focus on repairing these tears. — Let’s get started.— 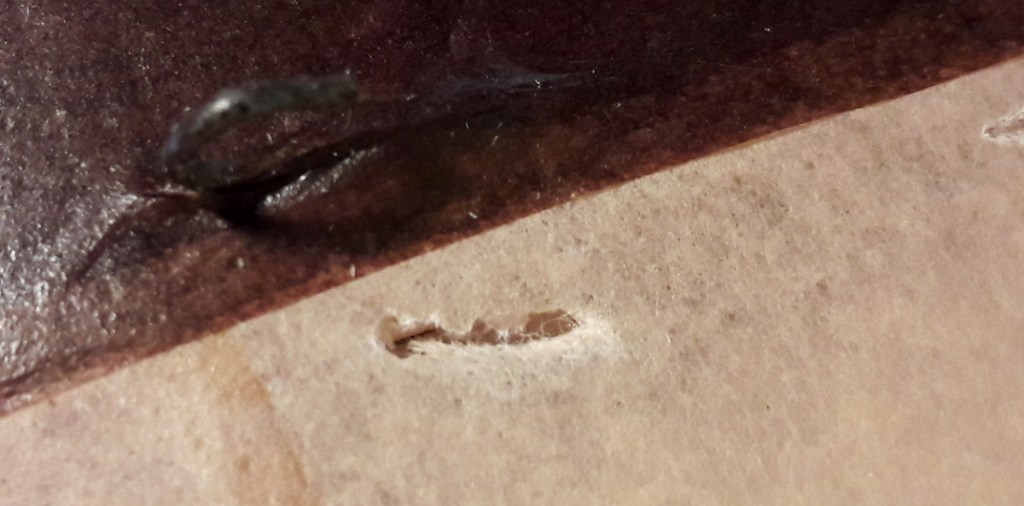
Here we see the tears close up. In a tear like this, the fabric is usually bent downward, as it is in this case. This is a small tear. As you get better at this you will take on larger ones with success! 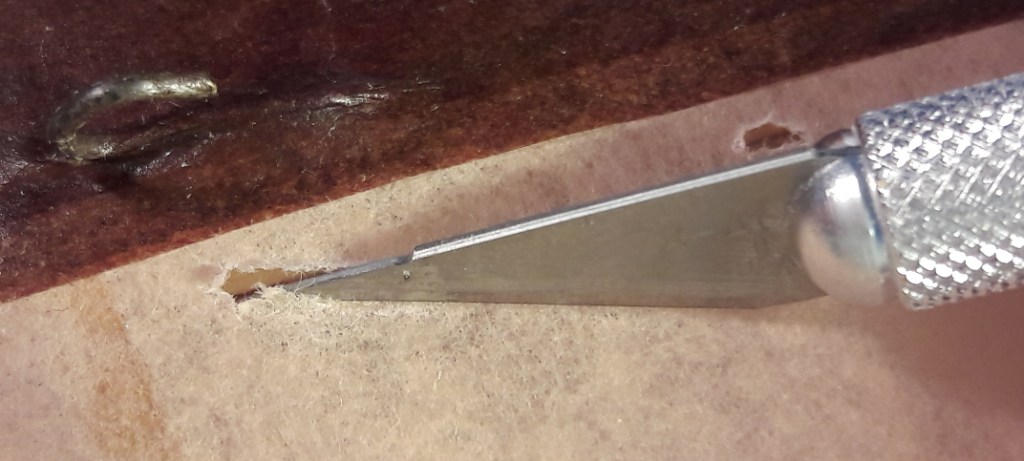
The first step is to bend the sides of the tissue upward and out of the hole. Sometimes it seems that some of the “tissue” is missing. However, it’s probably there but hiding below and folded under. This is where you must “unfold” it. Use the top blunt edge of the blade to do most of the work. 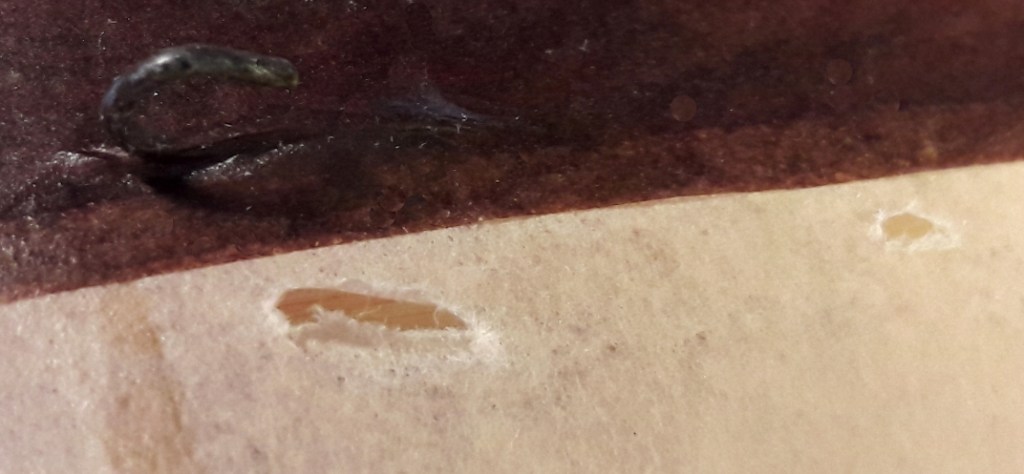
Notice here that now I was able to fold the tissue up and out of the hole. Sometimes you need to try to make bends in the tissue to get it to stay up and out of the hole. This is an important step as you will find out later. 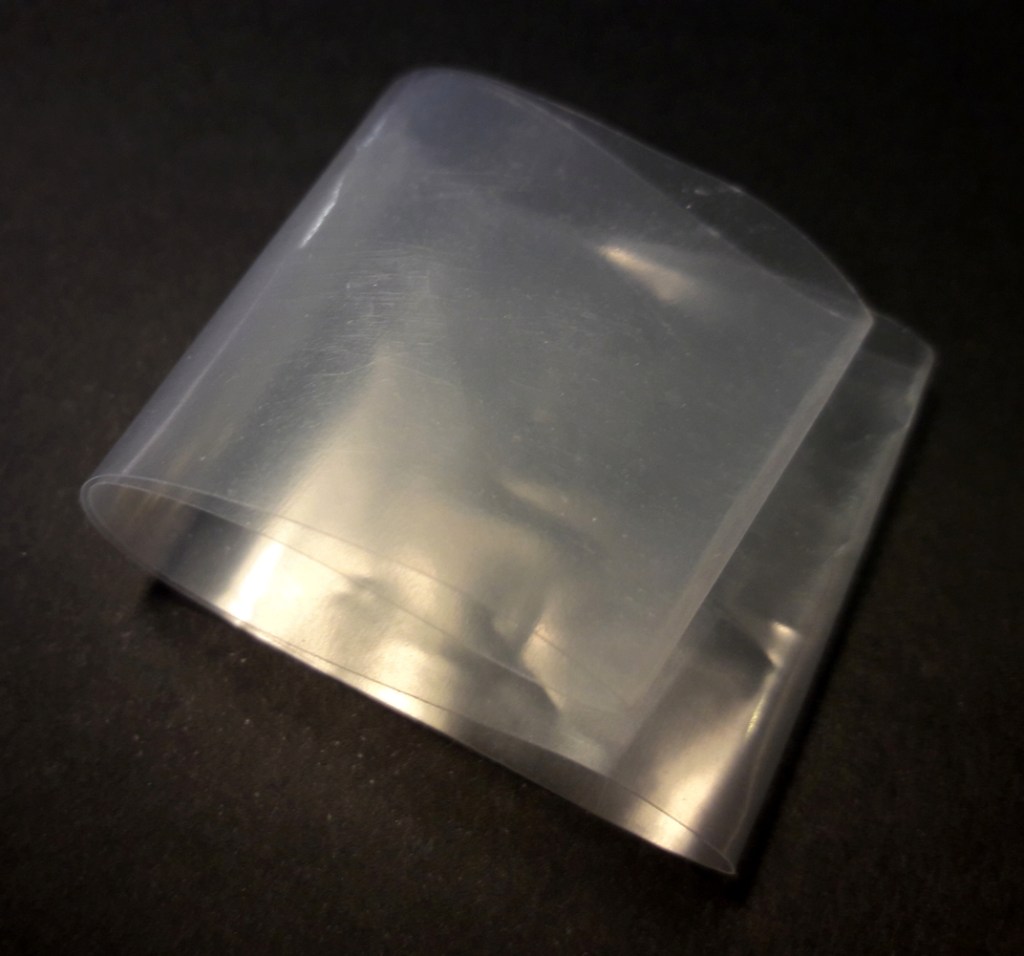
This is the “tool” we are going to use. Any smooth plastic bag material will do. It needs to be a little stiff to not have a tendency to bend. This was cut off the end of a bag. After a while you will get a feel for the right thickness of plastic. 
For most of the repairs you will be making, a good size for a strip would be roughly 3” long by 1” wide. Use a good pair of scissors to do this. Extra strips of various sizes will always come in handy. Keep them in a ziploc bag to keep them clean. 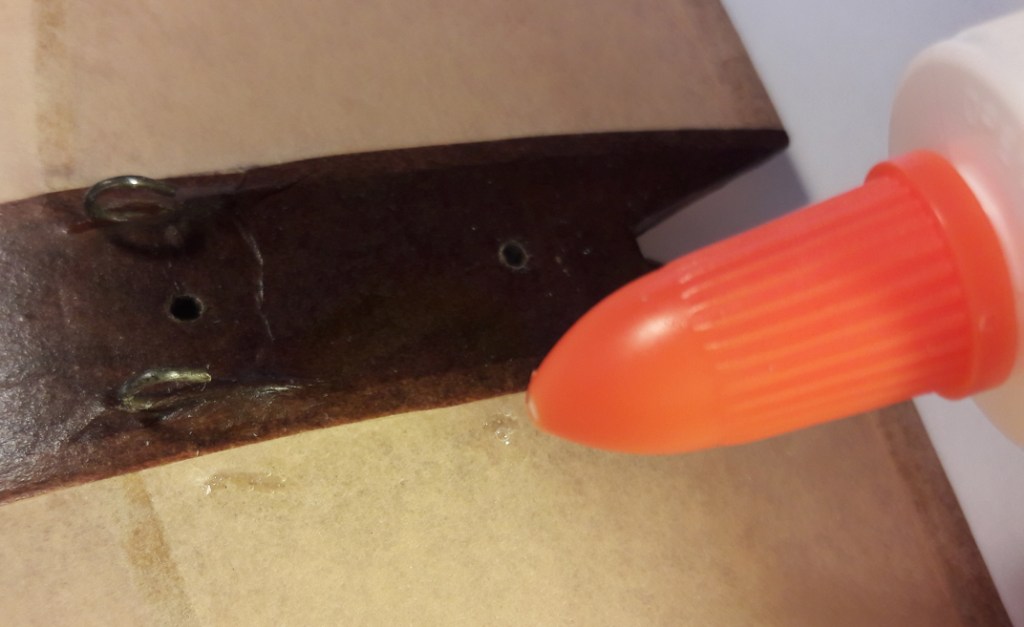
Next we are going to apply Elmer’s Clear Glue to the tissue edges. You don’t have to be real careful when this is done. Try not to get glue on the underside of the tissue. Office Supply stores and Walmart carry the glue in the school supplies section, and it’s not expensive. 
The process here is now to lay the plastic strip in the pool of glue and to pull upward on the strip to get the tissue fibers to stand up. They will then have a better chance of coming together when you place the strip on them again. You can do this several times. Try to get all of the edges of the tissue to come together. If there is still a hole, carefully go back in with the knife blade to persuade the last bits of tissue to fill in the gap or gaps. Don’t worry if you have applied too much glue—as you can reduce the amount of glue each time between times you repeatedly pull on the tissue edges with the plastic strip then wiping the excess glue off. If the tissue edges won’t pull up, let the glue dry somewhat to make it more tacky—then try again. You are in effect zippering up the sides of the tissue hole so they meet in the middle and the hole goes away. Capillary action is at work here and practice makes perfect. When satisfied, leave the strip in place to let dry for at least several hours. 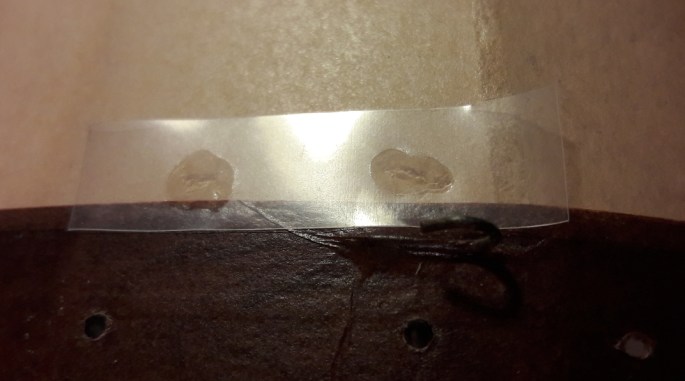
If you were successful on the last step—this is how the repair should look at this stage. The tissue has been brought together and the the pools are nice and flat. 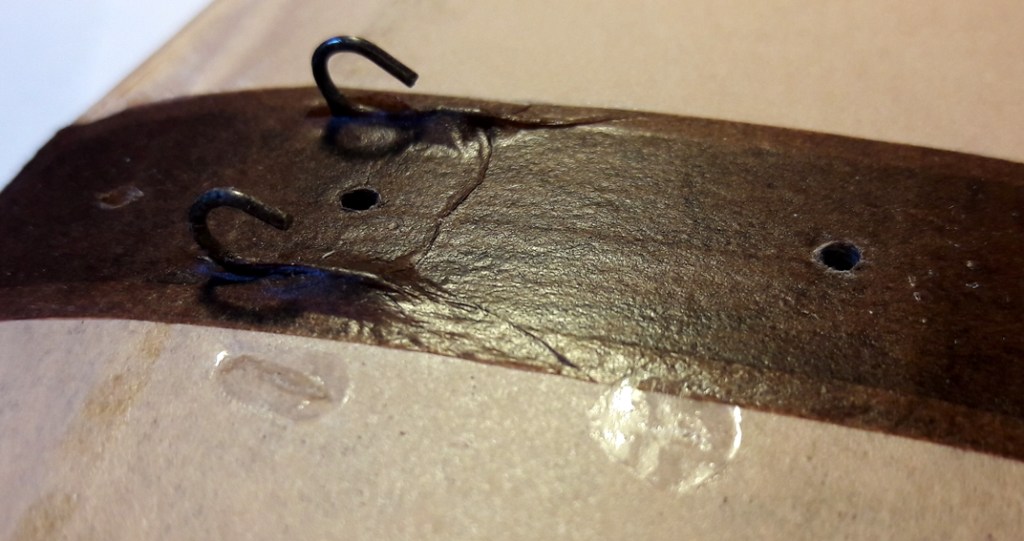
Carefully pull off the strip after it has dried at least a couple hours. This is what the repair will look like. If we had used Duco Cement, this is where we would have to quit. 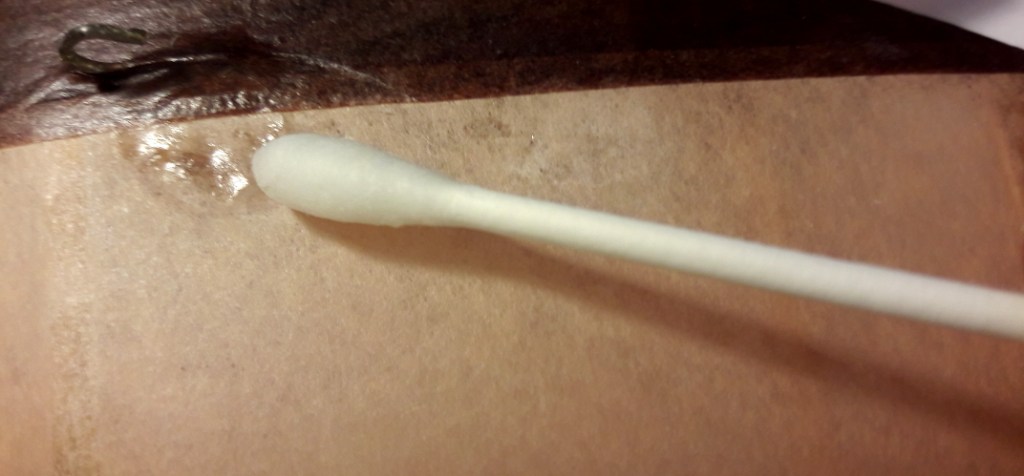
Using a Q-tip soaked with water and a side to side motion, gently scrub away some of the dried glue away from the outer edges. Leave the glue in the center, where the bonding is taking place. 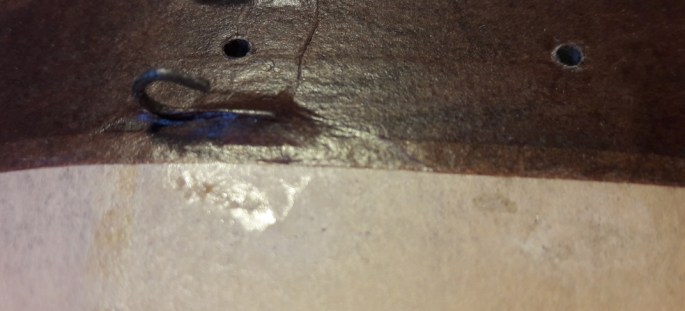
After drying, here we see the repair with most of the outlying puddle gone. The inner shiny appearance will go away with the final spray finish on the tissue, which I will talk about next. 
Here is the coating I use for all my Tissue and Stick Model Aircraft. The can as pictured here has so many names on it that I don’t know exactly what to call it—so I settle on “Krylon Clear Spray — Flat Finish”. It also comes in Satin finish so it’s your choice whether to use Satin versus Flat. I like the Flat because I have found that the Satin shows up glue spills on the tissue whereas the Flat shows them far less. I also just like the appearance of the Flat as it is far more forgiving. This paint finish can be found most anywhere including HD, Lowes, and Ace Hardware, but my choice is Walmart because of its lower cost. 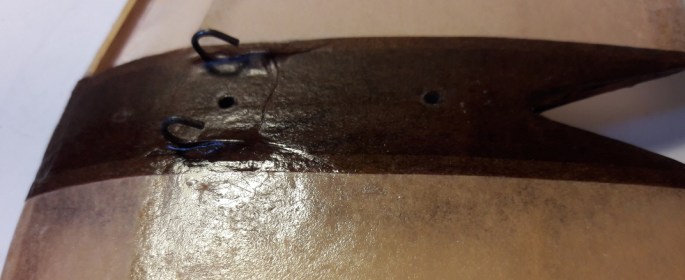
When first applied, the “Flat” coat will look like this. Make sure it is even, but don’t go overboard. Some modelers recommend several light “mist” coats—but for me one medium coat works well for me. I can see that I’ve gotten it even by observing the uniform shine of the coat that I’ve applied. I think one coat is enough—more coats just adds unnecessary weight. When spraying wings or stabs, coat one side at a time and let dry—preferably held in place on something perfectly flat like a sheet of glass. 
If you look closely you can see where the two holes were repaired. The repaired area on the left is a bit discolored but the one on the top right is nearly invisible. 
The final slide in this show shows the repairs made on the stab from a greater distance. The next slide is the first one in the series (the start of the slide show) so you can compare the two.
Hopefully if you have viewed the Slide Show Tutorial above, your take away was that the fact that the glue we are using is washable, thus we are able to make the repairs less visible. In essence in the past if you were using Duco Cement, you were not able to “clean up” the excess glue because it couldn’t dissolve.
One important thing to consider is to begin making the tissue repairs to your plane before they become larger. This is a good reason to stay on top of this. With a little patience and practice you can get your plane to look closer to it’s prior state of having little or no tears.
DEALING WITH LARGER TISSUE TEARS OR RIPS
Sometimes it’s obvious that trying to repair a really big rip or tear is just out of the question.
Look closely at the first and last slide of the slide show above. (You can click on the dots under the slide show to navigate to those photos, or just use the left and right arrows.) On the last slide of the show you will notice that there is a bay of tissue just above the brown strip and to the left with the tissue missing. The first slide of the show, however, shows tissue having been added.
What I want to point out here is that it’s hardly noticeable that I have replaced a bay of tissue on the stab. One way you can tell is that the tissue appears to have some wrinkles in it. What you are seeing here is the tissue before it is misted with water or 70% isopropyl alcohol. It should tighten up and the wrinkles should go away when it dries. For more about this process, see my web page Five Helpful Tips for Applying Tissue to Models
So when the damage is too great, and you can limit the area to be cut out to be a bay or two of the structure, you can totally replace the torn tissue in the offending bay or bays. To do this, carefully cut the tissue right up to the side of the balsa with an X-Acto blade (also marketed by Elmer’s Products Inc. BTW), trying not to cut into the balsa by holding the knife blade straight. You can see in the last photo of the slide show how this should look when the tissue is cut out of the bay.
Next step is to replace the tissue. To do this, carefully measure the width of the bay for the width of the piece of tissue you are going to use. I use millimeters abbreviated as mm. If you are not familiar with the metric system I urge you to quickly read this: How to Measure Centimeters. We are one of only three countries in the world that doesn’t use the metric system. Here is an interesting article titled Why the United States Doesn’t Use the Metric System. If however you prefer to use inches, go for it if it works for you. I just think it’s sometimes easier to use this system, but I must admit I trade off to US measurements sometimes, especially when I am dealing with balsa sizes for example that are measured in inches.
Now cut a strip of tissue the width of the bay, keeping in mind that you want the length to be longer so as to hold on to it as you glue the piece of tissue in place. It can be of any length as it will be trimmed later. At this point you are basically applying tissue to your plane like you normally would.
If you are relatively new to applying tissue, or could use a refresher course, this subject is addressed in Tip number 1 of my Five Helpful Tips for Applying Tissue to Models web page. Ron has a series of 5 videos that are great. They are called Ronny Gosselin’s — How To Cover a Model with Tissue Videos. You can find the links to his series if you go to the link of the 5 TIPS web page above.
There you have it. Hopefully this has been helpful information to add to your growing set of Aëromodeling skills. If you liked this tutorial and article, leave a comment below in the LEAVE A REPLY box below. Thermals. — Jeff Nisley—
