

Visit our sister website to see what the PHOENIX / Aerial Experimental Association has in store for converting Old-timer Model Airplanes to Electric-Assist.

Article and Photography by Jeff nisley — Technical Input and additional Photography by Suman Saripalli and Paul Morgenroth, III
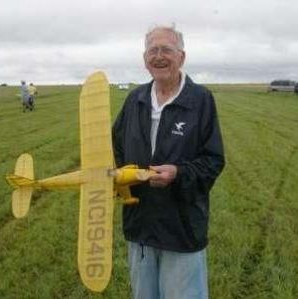
When Suman Saripalli and Paul Morgenroth, III set out to convert a classic stick and tissue rubber powered model airplane having quite a few issues, to a modernized remote controlled electric powered job, little did they know that they had a winner on their hands.
It turns out that this plane is a hybrid.

The fuselage and tail we believe is an Altimeter designed by Ed Schlosser around 1940 and was kitted by the BEST by TEST Model Company in 1942. The 48″ wing has yet to be identified, however they share a common builder—the late Carl Perkins.

He won a number of awards in national and international competitions and also enjoyed inventing new parts for his airplanes. Because he was an engineer by trade, many who knew him well point out that his DT systems and various mechanisms were almost always quite elaborate and were often more complicated than they needed to be to get the same job done. From this plane, we see however, he certainly knew how to build light, strong and precise.

Such an exquisite airframe along with clever RC integration techniques by Suman and Paul would surely make for a jewel of a flier.
Click HERE to see a tribute to this great man.
Carl Perkins — Nov 20, 1921 – Sept 27, 2010
Paul took up the project soon after Suman first flew the plane as an RC. Through rewiring alone he removed about 12 grams, which is a tenth of the model’s dry weight! With a larger prop and a bit of battery experimentation, he was able to get flight times well over an hour on a single charge. After a 78 minute flight, he finally admitted he’d never flown anything better.
Around this time, the old Altimeter-Hybrid became Paul’s favorite plane, and he decided to have it restored. It was in disrepair and never really looked as good as it flew. That’s where the author of this web page comes in. After some horse trading I agreed to do the restoration.
You can follow along with the restoration by viewing the photos of the Slide Show at the bottom of this web page. Note also that by studying Suman’s and Paul’s work through these photos you can get an idea how the electronics can be integrated into the structure of a plane like this originally meant to be rubber powered.
Before you view the slideshow, however, I would like to first give you some pointers and strategies regarding the process of restoring one of these birds and also point out a technique that I developed which is useful when re-covering older vintage tissue covered model airplanes.
Restoring Vintage Stick and Tissue Model Airplanes 101

Restoring an old timer model aircraft usually requires removing the deteriorated tissue from the balsa structures. Try different solvents by starting with the least aggressive and work your way up to more aggressive ones. Most of the time acetone will dissolve the glue holding the tissue but not always. Be sure your work space is well ventilated and wear gloves. Soak well and use flat sanding blocks to sand and also you can use use various razor blades and scrapers to scrape material away. It’s best to experiment to see what works best. Be careful not to sand too much and to respect the original structure.

Address any problems you may find along the way and re-glue questionable joints as you go. Sometimes the use of plastic wood is in order to smooth and fill in areas. My favorite brand is called Famowood Wood Filler available at Ace Hardware. I prefer acetone based as opposed to the water based product and get the color called “Natural”. It’s as close to the natural color of balsa as you are going to get. Because it tends to dry out quickly, adding a small amount of acetone (also available at Ace) and stirring it will bring it back to it’s original peanut butter consistency. Apply using a palette knife that painters use which you can pick up at Hobby Lobby.
Fix and take away things of a bygone era. If you are keeping it rubber powered then often it is necessary to move the motor peg forward a bay or two in order to move the CG forward. I tend to take away snuffer tubes and the like. Often I will reconfigure the D/T system to use a newer timer. A great source for putty type badge timers and the springs needed for D/T systems can be found at this page on the Starlink Flitetech Models website.
Often times it is nearly impossible to get all the tissue off. At right is a photo of what you are often left with. If the original color of the tissue is darker than the shade of the balsa, as it is with red, or even with lighter colors—when you try to add new tissue these spots will show through because the tissue is semi-transparent. In most cases this is will end up making the job look blotchy.
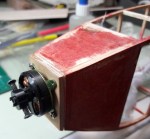
Here I am masking the electric wires and components in anticipation of spraying the Fucelage with SAND colored Rust-Oleum spray paint.
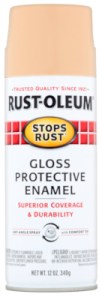
I have found a two step process workaround to this problem that is fairly easy to do, saves time, and has great results. The solution is to paint a very light coat of Rust-Oleum spray paint to the questionable areas using the color SAND, which is a tan shade that closely matches the color of balsa. Because we are only painting the structure, I think the improvement in looks greatly outweighs any weight gain. IMO the trade off is worth it. One more step is needed to make this technique work however.

Through trial and error I have found that one must let this enamel coat dry for at least 3 days and then apply a top coat of Krylon Clear Spray. This is needed or else when you put on the tissue using a glue stick and use Isopropyl alcohol in the process, the alcohol will dissolve the enamel and cause it to leach into the tissue. Don’t ask me why.
Krylon Clear Spray, which comes in both flat or satin finishes, is basically an acrylic lacquer so for some reason it seems to correct this problem. It is also the finish I use for covering the tissue at the end of the process, instead of dope. More about tissue covering is covered in my webpage on this site called Applying Tissue to Model Airplanes.
If you look closely at the top of the uncovered fuselage above the battery access door shown at left, you’ll note that the sand painted areas look a lot like original balsa. Believe me. When it’s covered with tissue, you can’t tell the difference between real balsa wood and the sand colored painted areas.
By the way, my favorite glue sticks are the ones I get from Staples with purple lids. Buy a quantity of them as my experience is that fresh ones tend to work best.
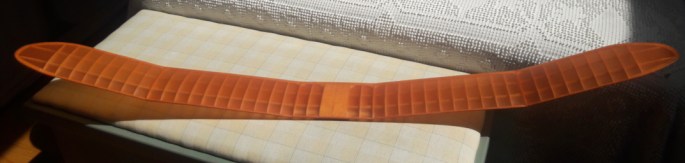
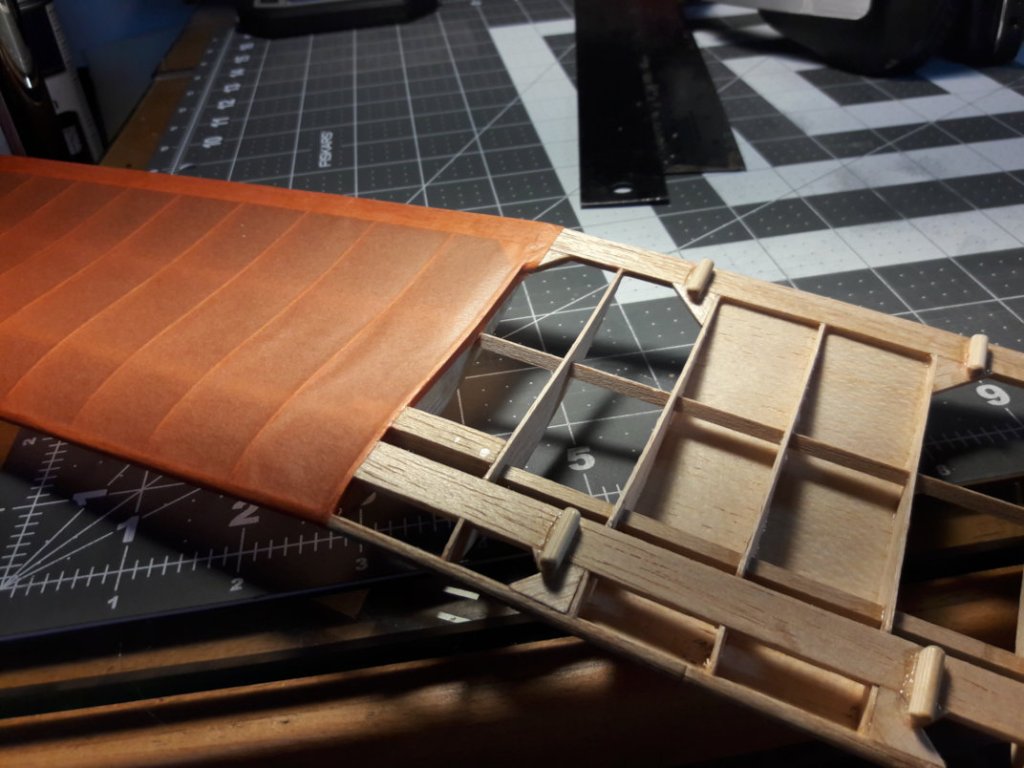
![]() For the bottom of a wing that has an under-camber like the one shown at left, it is important that the tissue is attached to all of the ribs. Apply the glue stick to all of the ribs, top and bottom. Sometimes the tissue will pull away from the rib, especially during the shrinking process. To correct this, use a small paint brush dipped in Isopropyl alcohol to re-invigorate the dried glue under the tissue. Use gentle finger pressure (use the tips of 3 or 4 fingers all at once and rub back and forth) to make sure the tissue in question is re-glued. Patiently wait until the alcohol evaporates from the tissue before you let up on the pressure. Make sure in fact that it is really glued by gently twisting the wing in that spot and watching the tissue flex. Gluing all the rib surfaces top and bottom helps with the strength of the wing IMO. For more info on applying tissue see my Hints’n Tips page on this website.
For the bottom of a wing that has an under-camber like the one shown at left, it is important that the tissue is attached to all of the ribs. Apply the glue stick to all of the ribs, top and bottom. Sometimes the tissue will pull away from the rib, especially during the shrinking process. To correct this, use a small paint brush dipped in Isopropyl alcohol to re-invigorate the dried glue under the tissue. Use gentle finger pressure (use the tips of 3 or 4 fingers all at once and rub back and forth) to make sure the tissue in question is re-glued. Patiently wait until the alcohol evaporates from the tissue before you let up on the pressure. Make sure in fact that it is really glued by gently twisting the wing in that spot and watching the tissue flex. Gluing all the rib surfaces top and bottom helps with the strength of the wing IMO. For more info on applying tissue see my Hints’n Tips page on this website.
Gallery and Slide Show Featuring the Altimeter-Hybrid Restoration
Click any photo to go to a Slide Show.
 Use the Esc key (top left corner) on your keyboard to exit the Slide Show,
or click outside any photo to also exit.

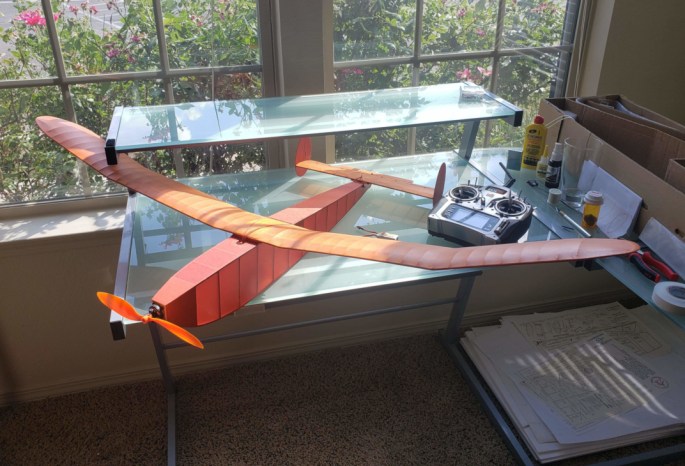
July 12th, 2020 —This is the first time it’s really been out in the sun. I wanted to show just how strong the colors show through on a bright summer day! — Paul Morgenroth, III 
Finished PHOENIX CONVERSION of the Altimeter -Hybrid truly worthy of its new name PHOENIX Altimetr-Hybrid. 
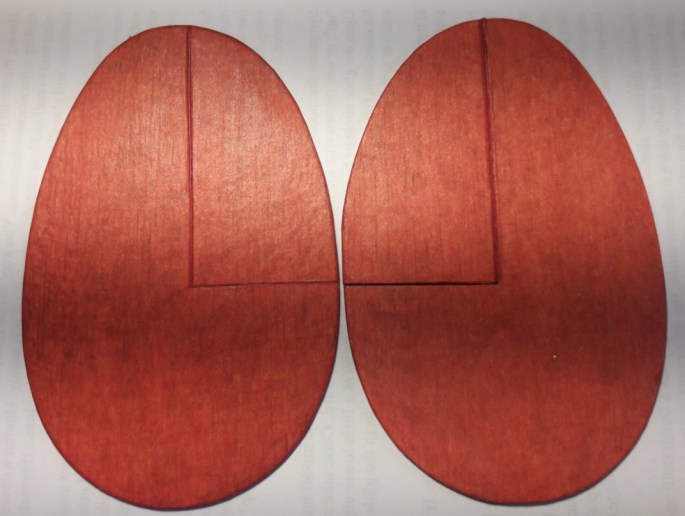
Plans for the Altimeter. Our wing is different that what is shown in the plan. We are uncertain what the wing is, but we are pretty sure that Carl Perkins was the maker. 
Follow along with us as we take this rather tired Old-timer toward a rejuvenated, more lively existence. 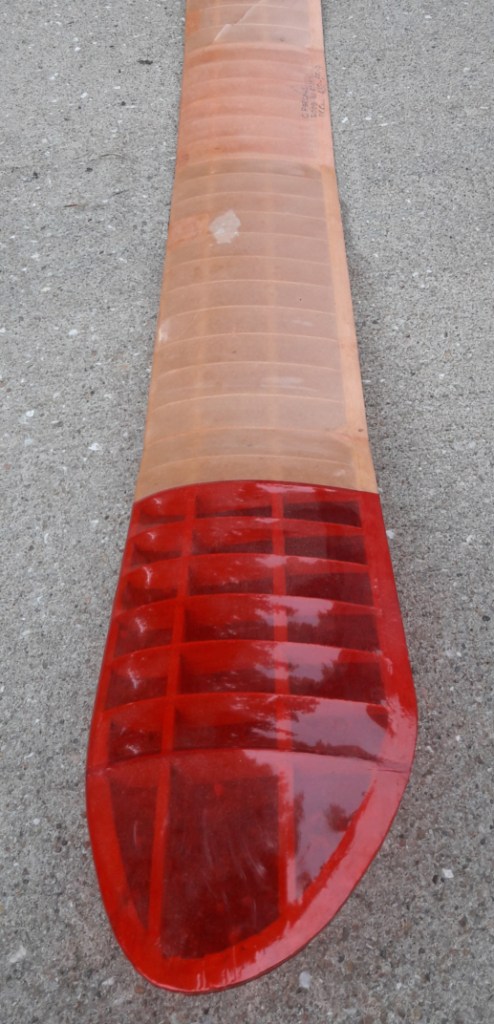
To initially get the plane into the air, Temporary repairs were made. Paul Morgenroth, III used a plastic covering. 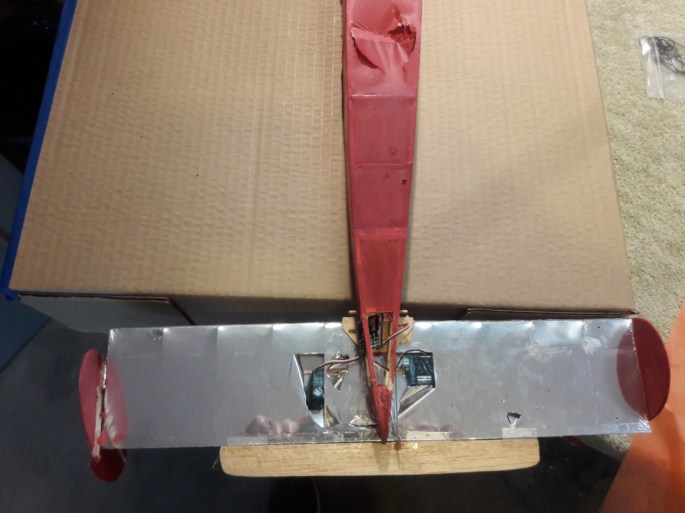
Shown is the initial installations done by Suman Sarapalli of the servos and tie rods on the horizontal stabilizer that control the control surfaces. At right is the servo that controls the elevator (tan piece of balsa at bottom of photo), while the left one controls the twin rudders of the vertical stabilizer. 
Initial electrical and control surfaces work performed by Suman Sarapalli. Note that the twin fins for this model now require them to be cut down the middle to accommodate a hinge in middle. In most cases it’s easier to make new. 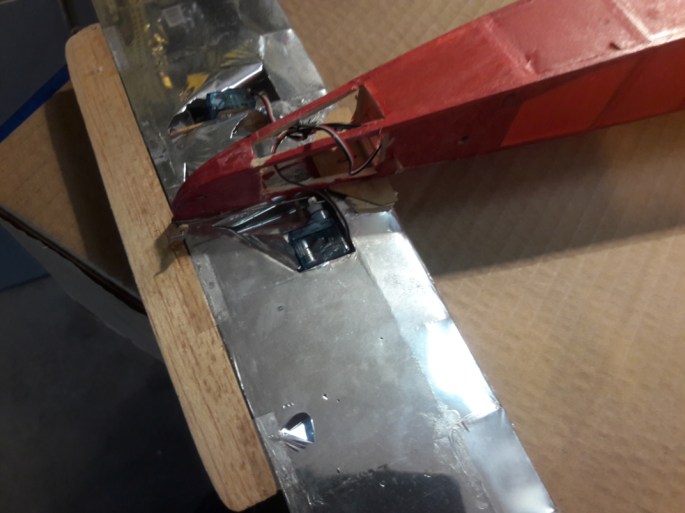
Back in the day it was common to use a light weight silver foil for stabilizers or “stabs” . Scotch tape was used for a very effective temporary hinge material. 
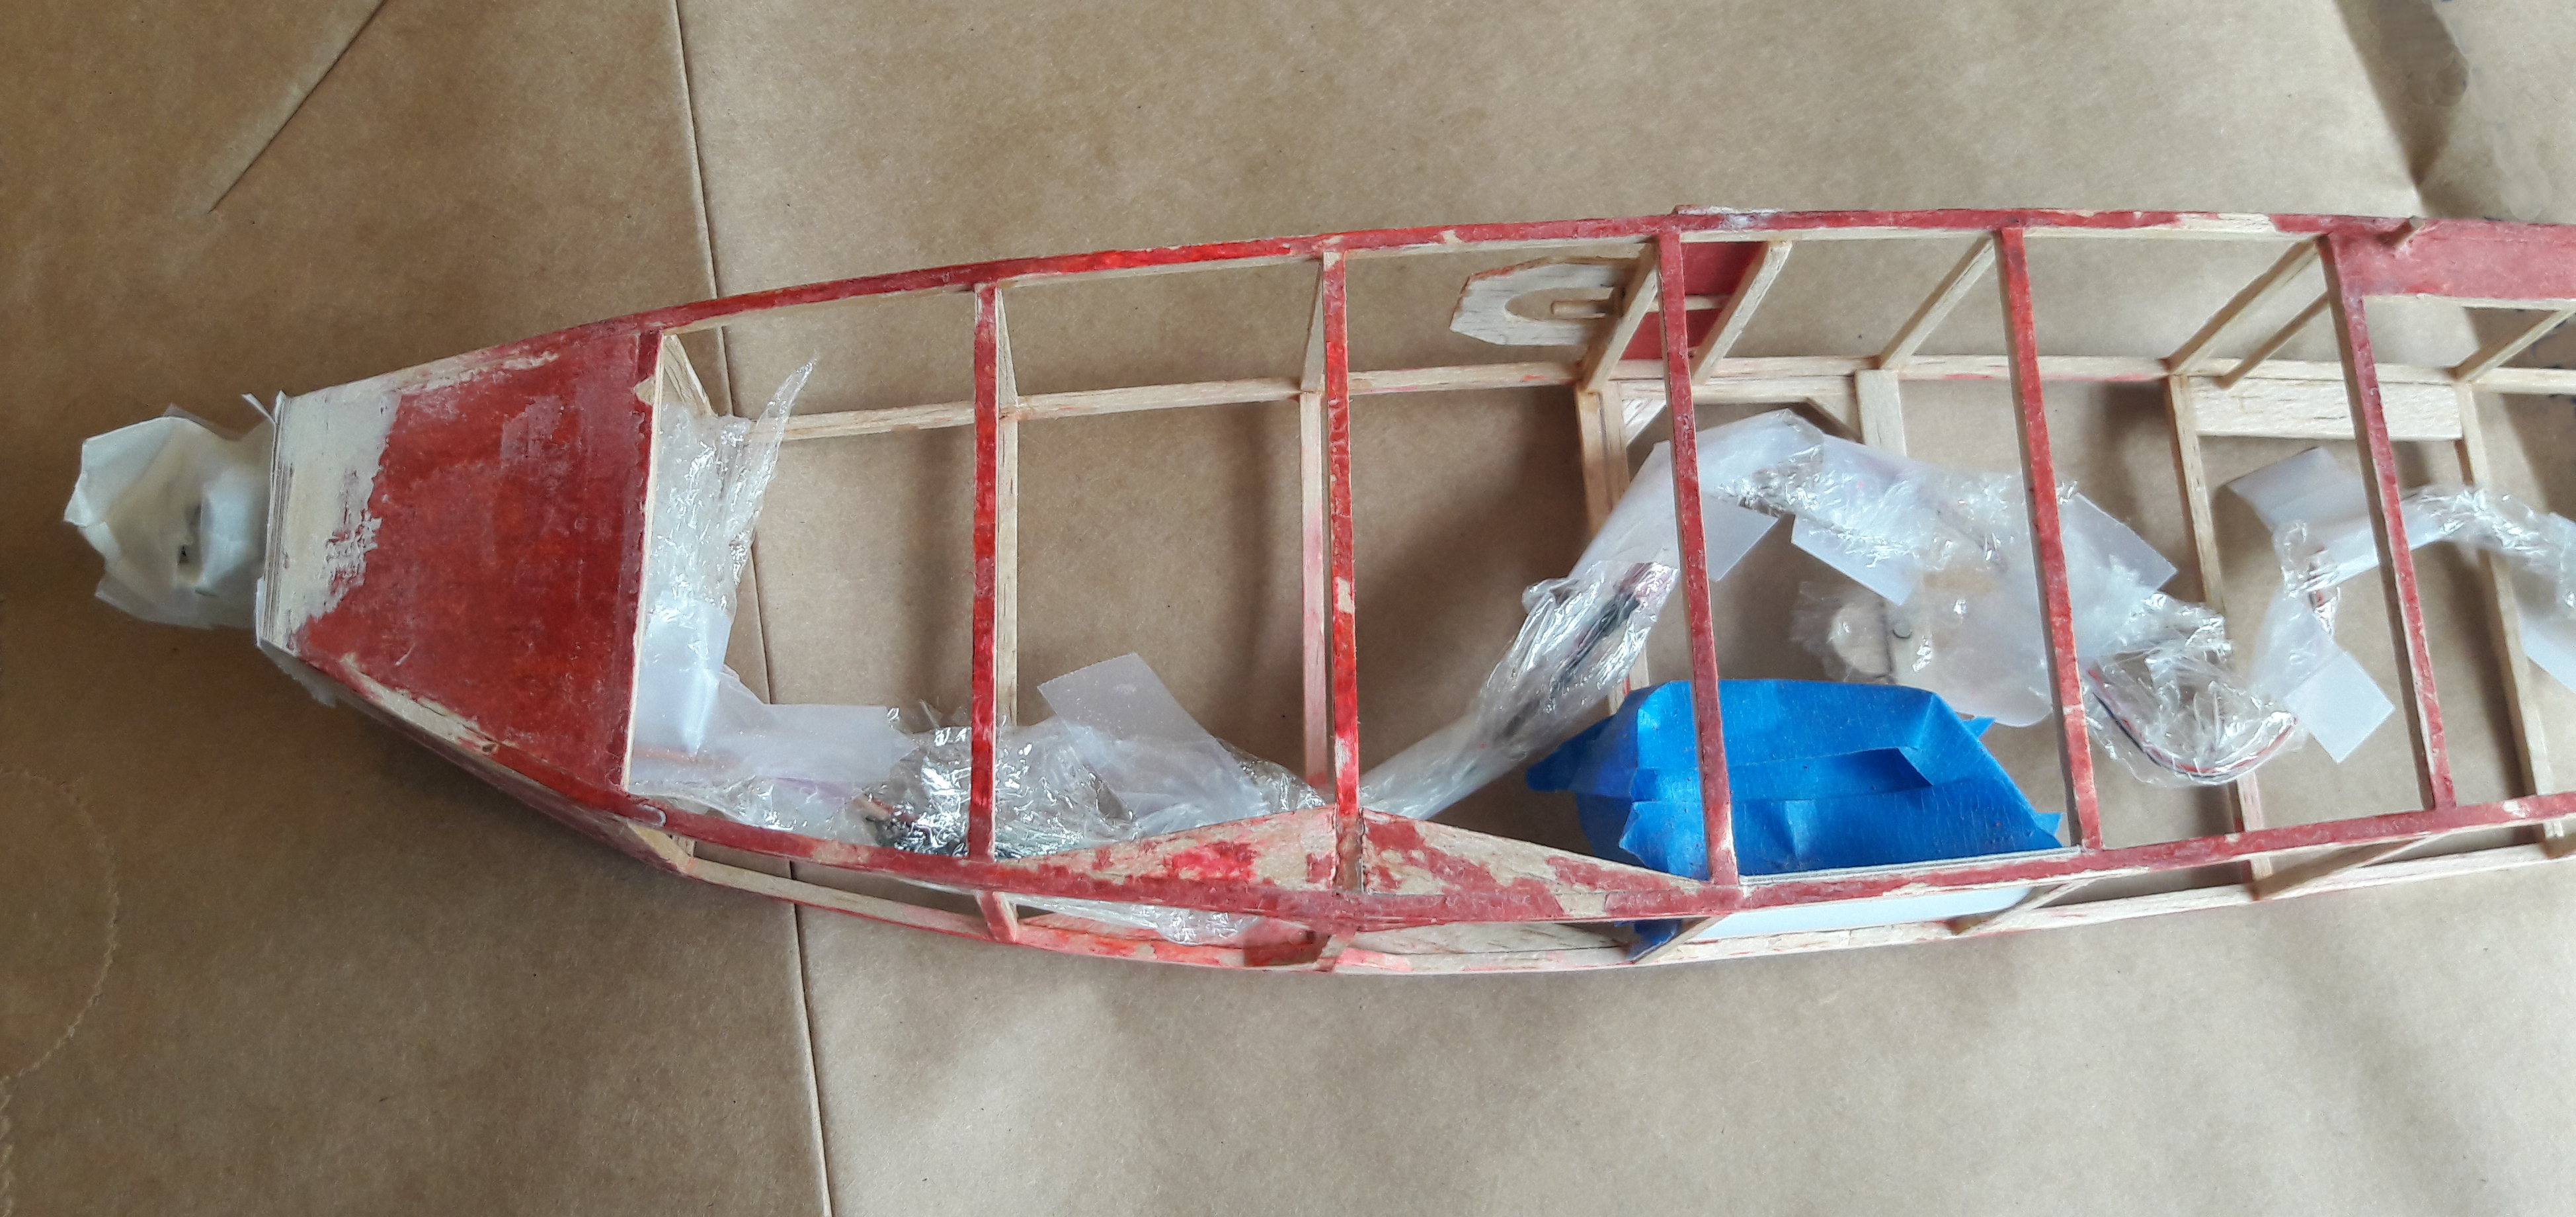
Top View of the physical as well as the electronic components that have been installed to be used to control the horizontal and vertical stabilizers. 
Having completed the preliminary work needed—here we see Suman Sarapalli as he prepares to fly the Altimeter- Hybrid for the first time on electric RC — May 2016. A successful and quite joyful DAY!!!! 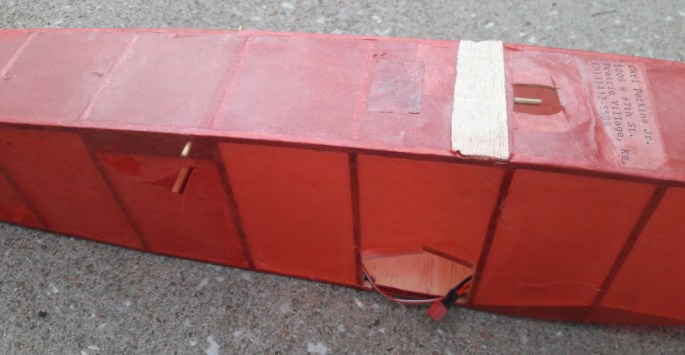
Paul took up the project soon after Suman first flew the plane as an RC. Through rewiring alone he removed about 12 grams, which is a tenth of the model’s dry weight! 
With a larger prop and a bit of battery experimentation, he was able to get flight times well over an hour on a single charge. After a 78 minute flight, he finally admitted he’d never flown anything better. 
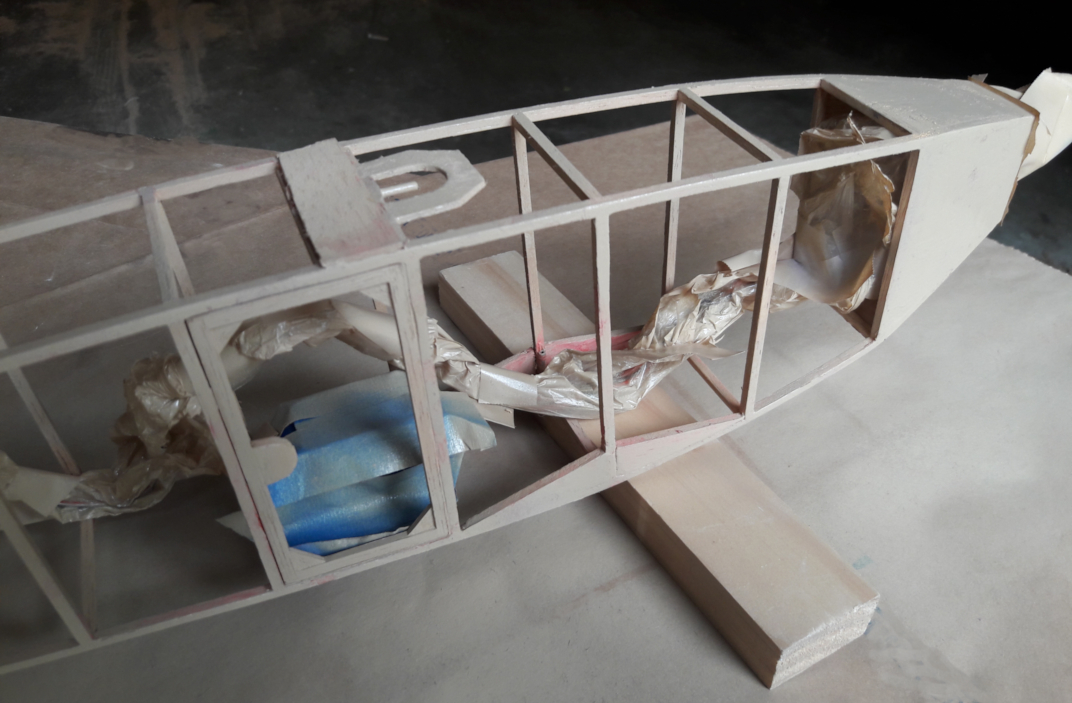
Around this time, the old Altimeter-Hybrid became Paul’s favorite plane, so he decided to have it totally restored. It was in disrepair and never really looked as good as it flew. Jeff Nisley agreed to do the restoration. Here we see most of the original tissue stripped off. Now is the time to check the strength of joints (add CA or duco cement if needed) and to take away unnecessary features reminiscent of its days as a rubber powered model. 
A wick DT with a snuffer tube was removed to lessen the overall weight of plane. Also taken away was the Sheeted-in area used for the rear rubber motor tube. Having stripped off most of the silver foil that was on the stab, Jeff concentrated on relocating the servos to better integrate them into the shape of the airfoil. 
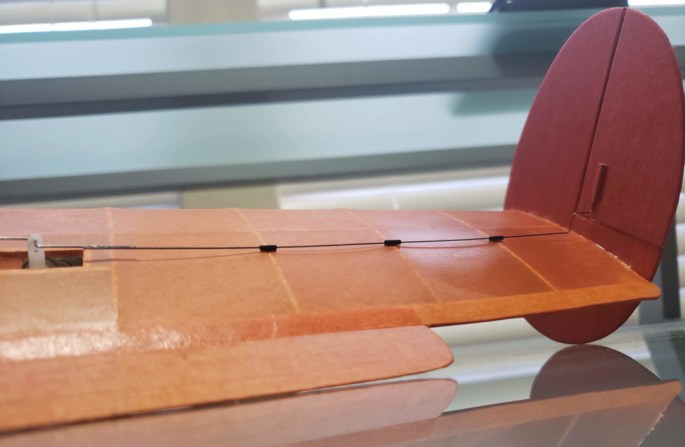
Another view of the stab with the servos glued in place. Note the two slots in the stab platform. It’s hard to see but there are corresponding tabs on the underside of the stab that fit in these slots thereby keeping the stab centered. Very nice way to do this. And light weight! 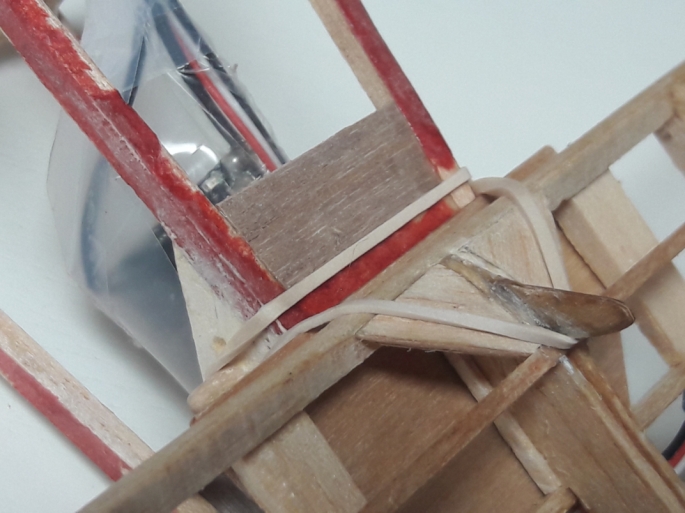
A cleverly placed rubber band is key to holding down the leading edge of the stabilizer. The tab you see built into the stab was an original feature that is shown on the drawing of the Altimeter Plan. Note how it is sandwiched between two ribs for strength and that its location makes it perfectly centered. Very effective. 
Note the addition of a triangle piece of balsa to accommodate a length of toothpick with its ends rounded off to hold the rubber band in place on both sides. Also notice the design of the rubber band hold down at the bottom of the fuselage. There is a “slot” for the rubber band to fit in comfortably. 
This tab—made of 1/32″ plywood—was added to the rear of the stab to act as the hold down “hook”. 


binary comment 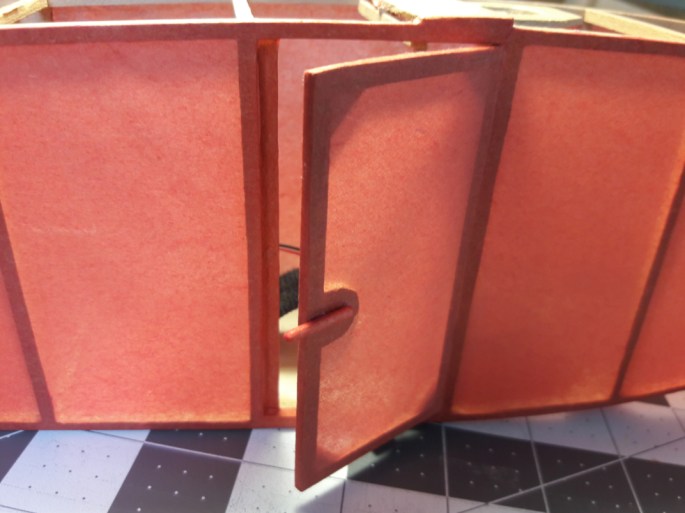
There are two opposing small 2mm magnets that hold the door shut (located under the handle) that are covered by the tissue. It’s a very light and effective way to accomplish this. 
Note that the twin fins for this model now require them to have control surfaces as shown in photo. A suitable hinge must be made for the vertical joint so the “control flaps or panels” can move back and forth. Tyvec envelope paper makes a strong hing as well as thin silk cloth. In most cases it’s easier to make new fins using the old as a pattern.. 


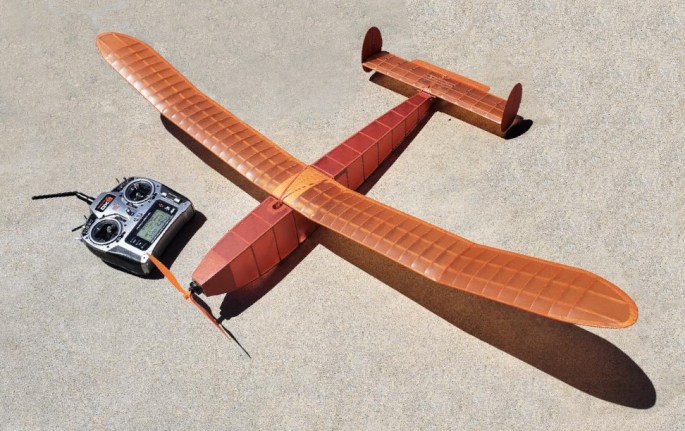
The Altimeter-Hybrid alongside Paul’s D8 Controller
